Donate for the Poorest Students

You can support for the poorest students. Copy the link in your browser & Donate as small as possible.. https://www.paypal.com/donate/?hosted_button_id=R3MNE48JU7KGL

Sunday, 16 July 2023

Water Hammer Calculator:Engineering & Science Calculators: Free Online Tools

Definition: Water hammer, also known as hydraulic shock, is a pressure surge that occurs in a piping system when the flow of liquid (usually water) is forced to stop or change direction abruptly. This phenomenon is caused by the incompressibility of water or any fluid flowing through piping system.
Click the Translate button(see right) on this post to set your Own Language to understand more perfectly!! Water Hammer Calculator

Water Hammer Calculator

Continue Definition:
Water Hammer: Pressure Surge in Plumbing Systems
Water hammer, also known as hydraulic shock, is a pressure surge that occurs in a piping system when the flow of liquid (usually water) is forced to stop or change direction abruptly. This phenomenon is caused by the incompressibility of water.
Here's a breakdown of water hammer considering pipe length, diameter, and flow velocity:
Cause and Effect:
Imagine water flowing through a pipe like a moving train. When you suddenly slam on the brakes (closing a valve rapidly), the water, unlike the train which can compress, has nowhere to go. This creates a high-pressure shockwave that travels through the pipe at the speed of sound in water. This pressure surge can cause:
Loud banging noises in the pipes
Pipe leaks and ruptures
Damage to valves and appliances

Factors Affecting Water Hammer:

Pipe Length: Longer pipes allow for more water to be moving at any given time, so a sudden stop will cause a larger pressure surge. The pressure increase is directly proportional to the pipe length.
Pipe Diameter: Smaller diameter pipes restrict the flow of water, leading to a higher potential pressure increase during a sudden stop.
Flow Velocity: The faster the water is flowing before the shutoff, the greater the pressure surge caused by water hammer.
Calculating Pressure Surge:
The pressure surge caused by water hammer can be estimated using the following equation:
ΔP = ρ * v * c
Where:
ΔP (Delta P) is the pressure increase (Pascals)
ρ (rho) is the water density (kg/m³)
v is the water velocity before the shutoff (m/s)
c is the speed of sound in water (approximately 1500 m/s)
Example:
Consider a washing machine connected to a 10-meter long pipe with a diameter of 2 centimeters. If the water flow velocity inside the pipe is 2 meters per second before the washing machine valve is shut off, estimate the pressure surge caused by water hammer.
Convert pipe diameter to meters: 0.02 meters
Calculate pipe area: π * (diameter/2)^2 = 0.000314 m²
Assume water density (ρ) is 1000 kg/m³
Plug the values into the equation:
ΔP = 1000 kg/m³ * 2 m/s * 1500 m/s
ΔP ≈ 30,000,000 Pa
Relation between Pascal (Pa) and PSI (psia):
Pressure is measured in different units. Pascal (Pa) is the unit of pressure in the International System of Units (SI). Pounds per square inch absolute (psia) is commonly used in plumbing applications. The conversion factor is:
1 psi = 6894.76 Pa
Therefore, the pressure surge in our example is approximately:
ΔP ≈ 30,000,000 Pa * (1 psi / 6894.76 Pa) ≈ 436 psi
This is a significant pressure increase that could potentially damage pipes or valves in a domestic plumbing system
.
Minimizing Water Hammer:
Water hammer can be prevented or minimized by:
Closing valves slowly
Installing water hammer arrestors or accumulators
Using larger diameter pipes
By understanding the factors affecting water hammer and taking preventive measures, you can ensure the smooth operation and longevity of your plumbing system
.
Water hammer Arrester Examples:
Here are few names of water hammer arrestors or accumulators:
Watts LF260 Series Automatic Water Hammer Arrestor
Fluidmaster 4A70 Anti-Hammer Arrestor
SharkBite UBAWHL Brass Water Hammer Arrestor
Thexton 8803-A Water Hammer Arrestor
IAPMO Listed Water Hammer Arrestor
Reed R200A Water Hammer Arrestor
NIBCO® Water Hammer Arrestor
JG AquaTune Water Hammer Arrestor
Sioux Chief® Water Hammer Arrestor
Lavelle Industries Water Hammer Arrestor

Application fields of water Hammer.

Water hammer isn't directly an application(sometimes water hammer is used for material cutting) itself, but rather a phenomenon that needs to be considered and addressed in various fluid system applications. Here are some examples of fields where water hammer is a concern:
Plumbing Systems: This is the most common example. Sudden valve closures in washing machines, dishwashers, or even quickly shutting off a faucet can cause water hammer.
Building Water Distribution Systems: In large buildings with long pipe runs, rapid pressure changes from elevators, fire sprinklers, or other high-demand fixtures can lead to water hammer issues.
Industrial Processes: Many industrial processes involve fluids like water, oil, or chemicals flowing through pipelines. Quick shutdowns of pumps, valves, or other equipment can cause significant pressure surges due to water hammer.
Power Plants: Water hammer is a concern in hydropower plants where rapid changes in water flow can damage turbines and pipelines.
Oil and Gas Pipelines: Long-distance pipelines transporting oil or gas can experience water hammer if valves are closed too quickly. This can lead to pipe leaks and potential safety hazards.
Fire Protection Systems: Sudden valve closures in fire sprinkler systems can cause water hammer, potentially damaging pipes and sprinkler heads.
HVAC Systems: Rapid changes in water flow within heating and cooling systems can lead to water hammer effects in pumps, valves, and piping.
In all these applications, understanding water hammer and taking preventive measures like installing arrestors, using gradual closing valves, or carefully designing pipe systems is crucial to ensure safe and efficient operation.

How it is possible to Earn money using the Knowledge of Water hammer calculation in real world???

There are several ways you can leverage your knowledge of water hammer calculations to earn money in the real world. Here are some possibilities:
Consulting Services:
Plumbing Design Engineer: As a plumbing design engineer, you can use your water hammer calculation skills to design safe and efficient plumbing systems for residential and commercial buildings. This may involve analyzing pipe lengths, diameters, and flow velocities to ensure water hammer is minimized.
Hydraulic System Consultant: Your expertise can be valuable to companies working with various fluid systems, not just plumbing. You can offer consulting services to analyze potential water hammer risks in industrial processes, power plants, or oil and gas pipeline projects.
Water Hammer Mitigation Specialist: Specialize in water hammer analysis and mitigation for existing buildings or systems experiencing problems. You can identify areas of concern, recommend solutions like water hammer arrestor placement, and perform calculations to verify the effectiveness.
Freelance Work:
Online Engineering Platforms: Utilize platforms that connect freelance engineers with clients. Offer your services for specific water hammer analysis projects or design reviews.
Direct Client Outreach: Network with plumbing contractors, mechanical engineering firms, or building developers to offer your water hammer calculation expertise for their projects.
Content Creation:
Online Courses: Develop and sell online courses teaching water hammer calculations and mitigation strategies for plumbers, engineers, or DIY enthusiasts.
Technical Blog/Website: Create a website or blog dedicated to water hammer. Provide informative content on the topic, including water hammer calculations, case studies, and best practices. Monetize through advertising, affiliate marketing, or premium content subscriptions.
Software Development:
Water Hammer Calculation App: Develop a mobile or web application that allows users to input pipe dimensions, flow rates, and other parameters to calculate potential water hammer pressure.
Additional factors to consider:
Combine your knowledge: For some opportunities, combining your water hammer expertise with other engineering skills like fluid mechanics or pipe design could be beneficial.
Networking and Marketing: Building relationships with potential clients and promoting your services effectively is crucial for success. By leveraging your knowledge of water hammer calculations in creative ways, you can establish yourself as a valuable resource and earn money in the real world.
Do YOU Want To Earn Money In Various Ways, Click The Link & Explore Your Field of Interest!!!

Groundwater Lowering Calculator:Engineering & Science Calculators: Free Online Tools

Definition: Groundwater lowering refers to the process of artificially reducing the level of groundwater in the ground. This is typically done to create dry and stable conditions for construction projects involving excavation below the water table.
Click the Translate button(see right) on this post to set your Own Language to understand more perfectly!!
Groundwater Lowering Calculator

Groundwater Lowering Calculator

Continue Definition:
Groundwater Lowering
Groundwater lowering refers to the process of artificially reducing the level of groundwater in the ground. This is typically done to create dry and stable conditions for construction projects involving excavation below the water table.
Factors Affecting Groundwater Lowering
Excavation Depth: The depth of the excavation determines the target water level that needs to be achieved for a dry work environment.
Initial Water Level: This is the natural level of the groundwater table before any manipulation.
Final Water Level: This is the desired level of the groundwater table after the lowering process. The difference between initial and final water level determines the amount of water that needs to be pumped out.
Soil Specific Gravity: The specific gravity of the soil affects the permeability, which in turn influences the ease of pumping water out. Soils with higher specific gravity (denser) tend to have lower permeability, requiring more complex dewatering systems.
Equation for Drawdown
One common equation used to estimate the drawdown (change in water table level) caused by pumping is the simplified version of the Dupuit equation:
h^2 = D^2 + Q / (K * b)
Where:
h - drawdown (distance between initial and final water level)
D - depth of the pumping well from the initial water table
Q - pumping rate (volume of water pumped per unit time)
K - hydraulic conductivity of the soil (a measure of permeability)
b - aquifer thickness
Example:
Imagine a construction site with an initial water table depth of 5 meters (D). You need to excavate 3 meters further down (final water level = 8 meters from the surface) and the soil has a hydraulic conductivity (K) of 1 x 10^-4 m/s and an aquifer thickness (b) of 10 meters. To estimate the required pumping rate (Q) to achieve this drawdown, you can rearrange the equation:
Q = K * b * (h^2 - D^2)
Plugging in the values:
Q = (1 x 10^-4 m/s) * (10 meters) * ((3 meters)^2 - (5 meters)^2)
Q = 0.04 m^3/s
This simplified example shows that a pumping rate of 0.04 cubic meters per second might be needed to achieve the desired drawdown. In real-world scenarios, more complex software and analysis are used for accurate dewatering design.
Usefulness of Groundwater Lowering
Groundwater lowering is a crucial technique in various construction projects:
Building Foundations: It allows for safe and stable excavation for foundations below the water table.
Tunneling and Underground Construction: It helps prevent water inflow during tunnel boring or construction of basements and subway systems.
Utility Trench Installation: It creates dry conditions for laying underground pipes and cables.
Some soils specific Gravity for Example:
The specific gravity of soil varies depending on the mineral composition and the presence of organic matter. Here's a breakdown of some common soil types and their typical specific gravity ranges:
Sand: 2.63 - 2.67 (Due to quartz being a common mineral in sand)
Silt: 2.65 - 2.75
Clay: 2.70 - 2.80 (Clay minerals tend to be denser)
Organic Soil (Peat): Less than 2.0 (Organic matter is less dense than mineral grains)
It's important to note that these are general ranges, and the specific gravity of a particular soil can fall outside these values. For critical engineering projects, it's always recommended to perform a specific gravity test on the actual soil sample to obtain the most accurate value.Remediation Projects: It can be used to lower the water table for contaminated soil or groundwater treatment.
By artificially lowering the groundwater table, engineers can create a safe and controlled environment for construction activities, preventing delays and ensuring project success.
What is SOIL Specific Gravity & how to measure it?
Soil Specific Gravity
Soil specific gravity (Gs) is a dimensionless property that tells you how much denser the soil solids are compared to water. It's essentially the ratio of the unit weight of the dry soil particles to the unit weight of water at a specific temperature (usually 4°C or 20°C).
In simpler terms, it tells you if the soil grains are heavier or lighter than an equal volume of water.
Here's the equation for calculating soil specific gravity:
Gs = (Wo / (Wo - Ws)) * ρw
Where:
Gs - Specific gravity of soil (-)
Wo - Weight of the oven-dried soil sample (g)
Ws - Weight of the pycnometer with soil and water (g)
ρw - Density of water at the test temperature (g/cm³)
Measuring Soil Specific Gravity
A common method to measure soil specific gravity involves using a pycnometer. Here's a basic outline of the process:
Oven Dry the Soil: Take a representative soil sample and oven-dry it at 105°C to remove all moisture. Weigh the dry soil accurately (Wo).
Fill the Pycnometer: Weigh an empty and clean pycnometer (Wpyc). Fill it with distilled or de-aired water and weigh it again (Wpyc+w). Note the volume of the pycnometer (Vpyc) which is usually marked on the instrument.
Add Soil and Water: Carefully add the dry soil sample (Wo) to the pycnometer with some water. Ensure all soil particles are submerged. Remove any air bubbles by gently swirling or applying a vacuum.
Final Weighing: Top up the pycnometer with water to reach the same level as in step 2. Weigh the pycnometer with soil and water (Ws).
Calculation:
Calculate the volume of water displaced by the soil (Vw) using the following equation:
Vw = (Wpyc+w) - (Ws) - Wpyc
Now, you can use the main equation mentioned earlier to find the specific gravity (Gs).
Example:
Wo (weight of oven-dried soil) = 50 grams
Ws (weight of pycnometer with soil and water) = 200 grams
Wpyc (weight of empty pycnometer) = 100 grams
Vpyc (volume of pycnometer) = 100 cm³ (assuming the pycnometer volume is marked)
Density of water at 20°C (ρw) = 0.998 g/cm³
Vw (volume of water displaced by soil) = (200 g) - (200 g) - (100 g) = 0 cm³ (This indicates the soil particles filled all the voids in the pycnometer)
Gs = (50 g / (50 g - 0 cm³ * ρw)) * 0.998 g/cm³
Gs ≈ 3 (This is a very high value, indicating the soil might be dense or contain heavy minerals)
Note: This is a simplified example. In real-world scenarios, the displaced water volume (Vw) will have a positive value. Additionally, the specific gravity test procedures might involve additional steps for cleaning the pycnometer and correcting for temperature variations.
How it is possible to Earn by using the knowledge of Groundwater Lowering Calculation in our real life application????
Here are some ways you can earn a living by using your knowledge of groundwater lowering calculations:
Direct Applications:
Geotechnical Consultant: As a geotechnical consultant, you could offer services to construction companies or engineering firms. You would use your knowledge of groundwater lowering calculations to design dewatering systems for excavation projects. This would involve analyzing soil properties, estimating pumping rates, and selecting appropriate dewatering methods.
Environmental Consultant: Environmental consultants may be involved in projects requiring groundwater management. Your expertise in calculating groundwater lowering could be valuable for tasks like assessing potential impacts of construction on groundwater flow or designing systems to remediate contaminated groundwater.
Hydrogeologist: Hydrogeologists study groundwater resources and their interaction with the environment. Your knowledge of groundwater lowering calculations could be applied to projects like managing water levels in aquifers or designing well systems.
Indirect Applications:
Software Development: You could develop software tools for engineers and contractors to help them design dewatering systems. These tools could incorporate groundwater lowering calculations and allow users to input site-specific data to obtain recommendations for pumping rates and well placement.
Training and Education: With your expertise, you could offer training courses or workshops on groundwater lowering calculations and dewatering system design for construction professionals.
Additional factors that can increase your earning potential:
Experience: The more experience you have in applying groundwater lowering calculations to real-world projects, the more valuable your expertise becomes.
Licenses and Certifications: Depending on your location and desired career path, obtaining professional licenses or certifications in geotechnical engineering, hydrogeology, or environmental science can enhance your credibility and earning potential.
Communication Skills: Being able to effectively communicate technical concepts to clients and colleagues is crucial for success in any of these fields.
Remember: Earning through groundwater lowering calculations is typically achieved by applying this knowledge within a broader professional context like engineering, geology, or environmental science.
Do YOU Want To Earn Money In Various Ways, Click The Link & Explore Your Field of Interest!!!

Ground Improvement Cost Estimation Calculator: Free OnLine Tool

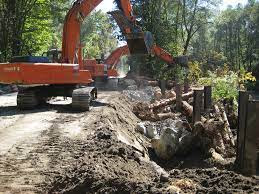
Definition: Ground improvement refers to various techniques used to enhance the engineering properties of soil, such as increasing its strength, stability, bearing capacity, or reducing its permeability. These techniques are crucial for safe and efficient construction on weak or problematic soils.
Click the Translate button(see right) on this post to set your Own Language to understand more perfectly!!
Ground Improvement Cost Estimation Calculator

Ground Improvement Cost Estimation Calculator

Definition Continue:
Ground Improvement Techniques with Cost Estimates and Usefulness
Ground improvement refers to various techniques used to enhance the engineering properties of soil, such as increasing its strength, stability, bearing capacity, or reducing its permeability. These techniques are crucial for safe and efficient construction on weak or problematic soils. Here's a breakdown of some common ground improvement methods with cost estimations and their applications:
1. Compaction:
Description: Mechanically densifying the soil by forcing air voids out, resulting in a denser and stronger soil mass.
Cost Estimation: $1 - $5 per square meter ($0.10 - $0.50 per square foot). This is a relatively inexpensive method.
Usefulness: Suitable for loose, granular soils like sand and gravel for foundations, pavements, or building pads. Less effective in clay-rich soils.
Example: A developer needs to improve the bearing capacity of the soil for a new housing project on a sandy site. Compaction using a vibratory roller can be a cost-effective solution at around $2 per square meter ($0.20 per square foot).
2. Grouting:
Description: Injection of a fluid material like cement or chemical grout into the soil to fill voids and create a stronger, more cohesive soil mass. Cost Estimation: $20 - $100 per meter depth per square meter treated ($5 - $25 per foot depth per square foot treated). This is a more expensive method compared to compaction.
Usefulness: Suitable for treating specific areas of weak soil, creating columns for foundation support, or reducing water permeability in excavations.
Example: An existing building foundation needs reinforcement due to weak soil conditions. Grouting with a suitable material can strengthen the soil around the foundation at an estimated cost of $50 per meter depth per square meter treated ($12.50 per foot depth per square foot treated).
3. Vibrocompaction (Vibro Replacement):
Description: Uses powerful vibrators inserted into the ground to densify loose soils while replacing some soil with crushed stone.
Cost Estimation: $30 - $80 per cubic meter ($10 - $25 per cubic yard). This is a more specialized and expensive method.
Usefulness: Effective for densifying deep foundations or large areas of loose, saturated soils.
Example: A bridge construction project requires densification of a deep layer of loose, sandy soil under the foundation. Vibrocompaction can be a suitable solution at an estimated cost of $50 per cubic meter ($15 per cubic yard).
4. Pile Foundations:
Description: Deep foundations consisting of precast concrete piles, steel H-piles, or driven timber piles driven into the soil to transfer building loads to a deeper, stronger soil layer.
Cost Estimation: $20 - $100 per linear meter ($6 - $30 per linear foot) for the piles themselves, plus additional costs for installation equipment and labor. This is a very expensive method. Usefulness: Used for structures requiring high load-bearing capacity or construction on weak or unstable soil layers.
Example: A high-rise building needs to be built on soft clay. Pile foundations can provide the necessary support at a significant cost, potentially exceeding $50 per linear meter ($15 per linear foot) for the piles alone.
5. Geosynthetics (Geogrids and Geotextiles):
Description: Using geosynthetic materials like geogrids or geotextiles to improve soil reinforcement, separation, filtration, or drainage.
Cost Estimation: $1 - $10 per square meter ($0.10 - $1.00 per square foot) for the materials, plus installation costs. This can be a cost-effective solution depending on the application.
Usefulness: Used for reinforcing slopes, retaining walls, or improving drainage in foundations.
Example: A road project needs to be built on a soft clay subgrade. Geogrids can be used to reinforce the soil and improve its load-bearing capacity at a relatively lower cost, potentially around $3 per square meter ($0.30 per square foot) for the material.
Important Note: These cost estimations are for illustrative purposes only and can vary significantly depending on project location, soil conditions, specific technique used, and market factors. Consulting with a geotechnical engineer is crucial for accurate cost estimations and selecting the most appropriate ground improvement method for a specific project.
Overall, ground improvement techniques play a vital role in ensuring the safety and stability of structures built on challenging soil conditions. By understanding the various techniques and their applications, engineers and construction professionals
How to improve Ground by either Compaction or Grouting Or Stoning:
Ground improvement by compaction, grouting, or stoning refers to techniques used to improve the mechanical properties (strength, stability, bearing capacity) of the soil, not its electrical conductivity for grounding systems.
Here's a breakdown of each method in the context of ground improvement:
1. Compaction:
Compaction involves mechanically densifying the soil by forcing air voids out of the soil particles, bringing them closer together. This process increases the soil's density and strength.
Compaction is often achieved using specialized equipment like mechanical tampers or vibrators.
This technique is most effective in loose, granular soils like sand and gravel. Clay-rich soils may not see significant improvement due to their inherent plasticity.
2. Grouting:
Grouting involves injecting a fluid material like cement or chemical grout into the soil to fill voids and weaknesses. This creates a stronger, more cohesive soil mass.
Grouting materials are chosen based on their strength, setting time, and compatibility with the soil conditions.
Grouting is a targeted approach suitable for treating specific areas of weak soil or creating columns of improved soil to support structures.
3. Stoning:
Stoning involves placing crushed rock or gravel around an area to create a stiff, stable base. This method improves the load-bearing capacity of the ground and helps prevent settlement.
Crushed rock provides a more stable and uniform base compared to natural soil. This can be beneficial for foundations, pavements, or other structures.
Stoning is a simpler technique but may not be suitable for deep soil improvement or where high strength is required.
Choosing the Right Method:
The selection of the most suitable ground improvement method depends on several factors, including:
Soil type and properties: Different methods are more effective for specific soil conditions like strength, permeability, and grain size. Project requirements: The desired improvement in terms of bearing capacity, settlement reduction, or overall stability will influence the choice of technique.
Site constraints: Space limitations or accessibility issues may influence the choice of technique.
Cost and ease of implementation: Each method has different cost considerations and installation complexities.
A geotechnical engineer can assess the specific site conditions and recommend the most appropriate ground improvement method by compaction, grouting, or stoning to achieve the desired engineering properties for a construction project.

How it is possible to Earn money using the Knowledge of Ground improvement cost calculation in real world???

There are several ways to leverage your knowledge of ground improvement cost calculation in the real world and turn it into income. Here are some possibilities:
Consulting Services:
Geotechnical Engineer: This is the most direct path. As a geotechnical engineer, you'd use your expertise in soil mechanics and ground improvement techniques to analyze site conditions, recommend appropriate methods, and perform cost calculations for construction projects.
Ground Improvement Contractor: Work for a ground improvement contractor, assisting with project proposals, cost estimations, and bidding processes. You can also be involved in project management, ensuring efficient execution within budget.
Independent Ground Improvement Consultant: Offer your services as an independent consultant to construction companies, developers, or engineering firms. You can specialize in specific ground improvement methods or cater to a particular niche within the construction industry.
Construction Project Cost Estimation:
Cost Estimator/Quantity Surveyor: Utilize your knowledge of ground improvement costs to create accurate cost estimates for construction projects. This includes estimating material quantities, labor costs, and equipment rentals for various ground improvement techniques.
Construction Project Management: In construction project management, your ground improvement cost calculation skills can be valuable for budgeting, scheduling, and risk management. You can ensure that ground improvement works stay within budget and are completed on time.
Content Creation or Training:
Develop Online Courses: Create online courses or training materials teaching construction professionals about ground improvement techniques and cost estimation methods.
Technical Blog/Website: Build a website or blog dedicated to ground improvement. Provide informative content on the topic, including cost analysis, case studies, and project comparisons. You can monetize through advertising, affiliate marketing, or premium content subscriptions.
Additional factors to consider:
Combine your knowledge: For some opportunities, combining your ground improvement cost calculation expertise with other construction knowledge like soil mechanics or foundation design could be beneficial.
Networking and Marketing: Building relationships with potential clients and promoting your services effectively is crucial for success.
Software proficiency: Familiarity with construction cost estimation software can be valuable in some roles.
By leveraging your knowledge of ground improvement cost calculation in creative ways, you can establish yourself as a valuable resource and earn money in the construction industry.
Do YOU Want To Earn Money In Various Ways, Click The Link & Explore Your Field of Interest!!!

Soil Stabilization Calculator:Engineering & Science Calculators: Free Online Tools

Definition: Soil stabilization is the process of altering the physical and chemical properties of soil to improve its engineering characteristics.
Click the Translate button(see right) on this post to set your Own Language to understand more perfectly!!
Soil Stabilization Calculator

Soil Stabilization Calculator

Continue Soil Stabilization Definition:
Soil stabilization is the process of altering the physical and chemical properties of soil to improve its engineering characteristics.
This can be done to:
Increase strength and bearing capacity
Reduce erosion
Minimize permeability (water flow)
Control dust generation
Properties of Stabilized Soil:
Enhanced Strength and Bearing Capacity: Stabilized soil can withstand higher loads without failure, making it suitable for construction applications like foundations, roads, and embankments.
Reduced Erosion: Stabilization techniques can bind soil particles together, reducing their susceptibility to erosion by wind or water.
Lower Permeability: In some cases, stabilization can help control the flow of water through the soil, which can be beneficial for applications like landfill liners or managing groundwater flow.
Dust Suppression: Stabilization can minimize dust generation from exposed soil surfaces, improving air quality and visibility. Example of Soil Stabilization:
One common method of soil stabilization is cement stabilization.
Here, Portland cement is mixed with the soil, and the mixture hydrates (reacts with water) to form a strong, rigid matrix that binds the soil particles together. This process increases the strength, bearing capacity, and erosion resistance of the soil
Cohesion (c), angle of internal friction (φ), and pressure (σ) are all important concepts related to soil stabilization, though not in the way they might be directly measured.
Here's a breakdown of their roles:
Cohesion (c):
Represents the inherent "stickiness" of soil particles due to factors like clay content, moisture, and chemical bonds.
Cohesive soils (high clay content) can resist shear forces (forces that tend to make the soil slide) even without external pressure.
Soil stabilization techniques often aim to increase cohesion by adding binding agents like cement or lime. This effectively "glues" the particles together, enhancing the soil's overall strength.
Angle of Internal Friction (φ):
Represents the internal resistance of soil particles to sliding past each other.
Imagine loose sand: even with no external pressure, the sand grains can slide easily due to their low internal friction angle.
Certain stabilization methods, like mechanical compaction, can increase the internal friction angle by densifying the soil and creating a more interlocking grain structure. Higher density leads to increased friction between particles.
Pressure (σ):
Plays a crucial role in how these properties manifest.
Cohesion becomes more significant at lower pressures, holding the soil together even without significant external forces. As pressure increases, the internal friction between particles becomes more dominant in resisting shear forces.
In some stabilization methods, like geosynthetics (reinforcing fabrics), pressure applied by the soil on the geosynthetic helps distribute loads and improve overall stability.
Measuring Soil Stabilization:
The equation used to calculate soil stabilization Requirement is as:
Stabilization Requirement=(cohesion * Math.tan(angle * Math.PI / 180)) / pressure;
While cohesion and φ aren't directly measured in the field for routine stabilization assessments, they are often indirectly evaluated through standard tests:
Unconfined Compressive Strength (UCS): As mentioned earlier, UCS measures the maximum compressive stress a soil sample can withstand. This indirectly reflects the combined effects of cohesion and internal friction. Higher UCS indicates a stronger, more stabilized soil with both higher cohesion and potentially a higher internal friction angle.
Direct Shear Test: This test measures the shear strength of a soil sample under controlled normal pressure (σ). By plotting shear stress (τ) vs. normal pressure, we can obtain the Mohr-Coulomb failure envelope. This envelope is characterized by cohesion (c) and the angle of internal friction (φ). However, this is a more advanced laboratory test and not typically used for routine field assessments.
How to Earn Money using the test of soil stabilization Calculation in real world application???
Here are some ways you can earn money using your knowledge of soil stabilization calculations in real-world applications:
Consulting Services:
Independent Consultant: Offer your services as a soil stabilization consultant to construction companies, engineering firms, and government agencies involved in projects requiring soil improvement. You can analyze soil samples, recommend stabilization techniques based on calculations and project requirements, and design stabilization mixes.
Subcontractor to Geotechnical Engineering Firms: Partner with geotechnical engineering firms to provide specialized expertise in soil stabilization calculations. You can assist them with specific projects or offer ongoing support for their soil improvement needs.
Training and Education:
Develop Online Courses: Create online courses or workshops that teach contractors, engineers, and construction workers about soil stabilization principles and how to perform basic calculations. Platforms like Udemy, Skillshare, or even your own website can host your courses.
Conduct On-Site Trainings: Offer on-site training sessions to construction companies or engineering firms on soil stabilization calculations relevant to their specific projects. This allows for a more customized approach.
Software Development:
Develop Soil Stabilization Calculation Software: If you have programming skills, you could develop user-friendly software that allows engineers and contractors to input soil parameters and receive recommendations for stabilization techniques based on calculations. This could be a paid software program or a subscription service.
Content Creation:
Create Educational Content: Develop a YouTube channel, blog, or social media presence focused on soil stabilization. Provide tutorials, explain complex concepts, and share real-world case studies to educate your audience. You can monetize this through advertising, sponsorships, or offering paid consultations.
Additional Considerations:
Network Effectively: Build relationships with construction companies, engineering firms, and other professionals who deal with soil stabilization projects. Attend industry events and conferences to promote your services or expertise.
Stay Up-to-Date: Keep your knowledge base current with the latest advancements in soil stabilization research and practices. Attend relevant workshops and conferences, and participate in professional organizations.
Highlight Your Value: Emphasize how your soil stabilization calculation expertise can help clients save money (by optimizing material usage) or avoid project delays (by recommending appropriate techniques). Focus on the cost-effectiveness and efficiency you can bring to their projects.
Remember, success comes from combining your technical knowledge with effective marketing and communication skills. By demonstrating the value you bring through accurate calculations and optimized solutions, you can establish yourself as a valuable resource in the soil stabilization field.
Do YOU Want To Earn Money In Various Ways, Click The Link & Explore Your Field of Interest!!!

Channel Erosion Calculator:Engineering & Science Calculators: Free Online Tools

Definition:It's a process where the flowing water detaches and removes soil or rock particles from the bed and banks of a stream or river. Here's a breakdown of the relevant factors and how they influence channel erosion
Click the Translate button(see right) on this post to set your Own Language to understand more perfectly!!
Channel Erosion Calculator

Channel Erosion Calculator

Continue Definition:
Channel erosion isn't directly defined by specific channel dimensions (length, width) or sediment load (kg/m). It's a process where the flowing water detaches and removes soil or rock particles from the bed and banks of a stream or river. Here's a breakdown of the relevant factors and how they influence channel erosion:
Channel Length (m): While length isn't a defining factor, longer channels can experience variations in erosion rates along their course. Steeper sections with higher flow velocities tend to erode faster compared to flatter sections.
Channel Width (m): Similar to length, width doesn't directly define erosion. Wider channels might experience erosion on the outer bends of meanders (where water velocity is higher) while accumulating sediment on the inner bends.
Sediment Load (kg/m): The amount of sediment a stream carries (kg/m) can influence erosion. High sediment loads can act like sandpaper, accelerating erosion. Conversely, very low sediment loads might indicate the stream is already eroding its bed and banks.
Erosion Rate (mm/year): This is a crucial factor. It refers to the average depth of channel bed or bank lowering per year, typically expressed in millimeters per year (mm/yr).
Example:
Imagine a river with a length of 10 kilometers (10,000 meters) and an average width of 50 meters. The sediment load might be 10 kg/m during high flow events and negligible during low flow. Here's how erosion could play out:
Steeper sections (maybe the first 2 kilometers) with faster water flow might experience an erosion rate of 5 mm/year due to the high velocity.
The middle section (next 5 kilometers) with a moderate slope might see an erosion rate of 2 mm/year.
The flatter downstream section (last 3 kilometers) might have an erosion rate of 1 mm/year or even accumulate sediment if the flow velocity is low.
This is a simplified example, but it highlights how erosion rate can vary within a channel based on factors like slope and flow velocity, even within the same channel dimensions.
For actual measurements, hydrologists use surveying techniques and historical data to track changes in channel depth and width over time. This helps them calculate the average erosion rate for a specific section of the channel.
How it is possible to Earn Money using the knowledge of Channel Erosion Calculation in real Life?????
There are several ways your knowledge of channel erosion calculations can be used to earn money in real life. Here are some examples:
1. Environmental Consulting:

Erosion Control Projects: Many companies and government agencies need help mitigating erosion problems near infrastructure (roads, bridges), shorelines, or agricultural land. Your expertise in calculating erosion rates would be valuable in designing and implementing solutions like riprap (stone armoring), vegetation buffers, or channel modifications.

Environmental Impact Assessments: Construction projects near waterways require assessments of potential erosion impacts. You could calculate erosion rates for different project scenarios and suggest mitigation strategies.

2. River Engineering and Restoration:

River Channel Design: Engineering firms designing new channels or modifying existing ones need expertise in erosion prediction. You could help design channels with optimal shapes and flow velocities to minimize erosion while maintaining functionality (e.g., flood control, navigation).
River Restoration Projects: Restoring rivers to a more natural state often involves managing erosion. Your skills could be used to assess existing erosion rates and design restoration features that promote habitat health and reduce erosion.

3. Data Analysis and Modeling:

Develop Erosion Prediction Models: Companies might need to develop software tools that predict erosion rates for different scenarios (e.g., climate change, altered land use). Your understanding of erosion calculations could be instrumental in building and validating these models.
Data Analysis for Erosion Monitoring: Government agencies or research institutions collect data on river channels over time. Your skills in analyzing this data (sediment load, channel depth changes) could be valuable in understanding long-term erosion trends and developing management strategies.

4. Educational and Training Services:

Develop Training Courses: Construction companies, engineering firms, and government agencies might need training for their staff on understanding and mitigating erosion. You could develop and deliver courses on channel erosion calculations and their practical applications.
Consulting for Educational Institutions: Universities or technical schools offering courses in hydrology or environmental engineering might need help developing curriculum related to channel erosion calculations.
These are just a few examples, and the specific ways you can leverage your knowledge will depend on your experience, skills, and interests.
Do YOU Want To Earn Money In Various Ways, Click The Link & Explore Your Field of Interest!!!

Pavement Marking Calculator:Engineering & Science Calculators: Free Online Tools

Definition:Pavement markings are painted lines, symbols, or legends applied on the road surface to provide guidance, information, or warnings to drivers, cyclists, and pedestrians. They play a crucial role in promoting traffic safety and orderly flow.
Click the Translate button(see right) on this post to set your Own Language to understand more perfectly!! Pavement Marking Calculator

Pavement Marking Calculator

Continue Definition:
Here's a corrected definition of pavement marking and the factors involved in calculating the amount of material needed:
Pavement Marking:
Pavement markings are painted lines, symbols, or legends applied on the road surface to provide guidance, information, or warnings to drivers, cyclists, and pedestrians. They play a crucial role in promoting traffic safety and orderly flow.
Factors involved in pavement marking calculations:
Road Length (L): This is the total length of the road section where pavement markings are to be applied. It's measured in meters (m). (Sample value: The road length might be 1 kilometer, which is equal to 1000 meters).
Line Width (W): This is the width of the individual pavement marking stripe. It's measured in centimeters (cm) or millimeters (mm). Common line widths for various markings can be found in standardized specifications set by transportation authorities. (Sample values: Centerline stripe - 10 cm, lane edge line - 15 cm).
Line Spacing (S): This applies to situations with multiple parallel lines. It's the distance between the centerlines of adjacent stripes. It's also measured in centimeters (cm) or millimeters (mm). (Sample value: Double yellow lines for lane separation might have a line spacing of 30 cm).
Number of Lines (N): This refers to the total number of parallel lines to be painted (e.g., a single centerline, double yellow lines for lane separation).
Calculation:
The primary calculation related to pavement marking involves estimating the total amount of paint or marking material needed for a specific project. Here's a simplified formula:
Total Paint (or Material) = L * (W + S) * N * Coverage
where:
L: Road Length (m)
W: Line Width (cm) (converted to meters for the calculation)
S: Line Spacing (cm) (converted to meters for the calculation)
N: Number of Lines
Coverage: This represents the amount of material required to cover a unit area (e.g., liters per square meter). The coverage value depends on the specific marking material and application method. It's usually provided by the manufacturer or obtained from reference tables based on industry standards.
Example:
Imagine you need to paint lane dividers on a 200-meter (L) road section. The lane dividers will consist of double yellow lines, each with a width of 10 cm (W) and a spacing of 30 cm (S) between them. The chosen paint has a coverage of 0.25 liters per square meter.
Step 1: Calculate the total width of the double line set (W + S):
Total Width = W + S = 10 cm + 30 cm = 40 cm (converted to meters: 0.4 meters)
Step 2: Apply the formula:
Total Paint = 200 m * 0.4 m * 2 * 0.25 liters/m² = 40 liters
Additional Considerations:
Pavement marking calculations may also consider factors like material waste during application, potential for overspray, or the need for reflective beads to enhance nighttime visibility.
Real-world projects might involve various types of markings with different line widths, spacing, and materials, requiring separate calculations for each type.
Following standardized specifications and using appropriate materials are crucial for ensuring the durability, visibility, and effectiveness of pavement markings.
Suggestions:
If you're interested in learning more about specific types of pavement markings and their applications, you can explore resources from your local transportation authority or national standards organizations.
Understanding pavement marking types and their purposes can be valuable for understanding traffic safety principles and road signage.
Consider software programs used by road construction companies. These programs can automate pavement marking calculations based on project specifications and integrate with material ordering systems.
How is it possible to Earn Money using the knowledge of Pavement Marking Calculation in our practical life?????
While pavement marking calculation itself might not be the sole skill that lands you a high-paying job, the knowledge can be valuable in various ways that contribute to earning potential in the construction and transportation sectors. Here's how:
Direct Applications:
Pavement Marking Contractors:
Estimating and Bidding: Companies that specialize in pavement marking rely on accurate calculations for materials (paint, reflective beads) to prepare bids for projects. Understanding pavement marking calculations helps estimate material needs efficiently and competitively.
Project Management: Planning and executing pavement marking projects require knowledge of quantities, crew sizes, and timelines. Pavement marking calculations play a role in creating realistic project schedules and ensuring efficient resource allocation.
Transportation Agencies:
Project Design: Engineers working on road design projects need to specify the layout and types of pavement markings required for a particular road section. Knowledge of pavement marking standards and calculations helps determine the amount of materials and plan the spacing of lines effectively.
Maintenance and Inspection: Inspectors who assess the condition of pavement markings need to understand standard dimensions and spacing to identify areas requiring repair or repainting.
Indirect Applications:
Construction Material Suppliers:
Sales and Technical Support: Sales representatives for pavement marking paints and materials can leverage knowledge of calculations to recommend appropriate quantities to customers based on project specifications.
Traffic Engineering Firms:
Traffic Safety Analysis: When conducting traffic safety studies, engineers might consider the effectiveness of existing pavement markings and propose improvements. Understanding pavement marking standards and calculations can contribute to this analysis.
Beyond Specific Jobs:
The knowledge of pavement marking calculations equips you with valuable transferable skills:
Attention to Detail: Accurate calculations require careful consideration of all factors like road length, line width, and material coverage.
Project Management Skills: Estimating material needs is a crucial element of project planning and budgeting.
Communication: Effectively communicating pavement marking plans and calculations to colleagues and clients is essential.
Earning Potential:
While pavement marking calculation itself might not be the highest-paying skill, it's a valuable component of the skillset required in various construction and transportation jobs. Salaries in these fields can vary depending on experience, location, and the specific role. However, positions involving pavement marking projects or transportation infrastructure design often offer competitive salaries and benefits.
Overall:
The knowledge of pavement marking calculations offers a valuable skill for a career in the construction and transportation sectors. It contributes to efficient project planning, accurate material estimation, and ultimately, the safety and functionality of our roads.
Do YOU Want To Earn Money In Various Ways, Click The Link & Explore Your Field of Interest!!!

QR Code Generator:Engineering & Science Calculators: Free Online Tools.

Definition: A *QR code* (Quick Response code) is a two-dimensional barcode that stores data, like text, URLs, or other digital information, ...